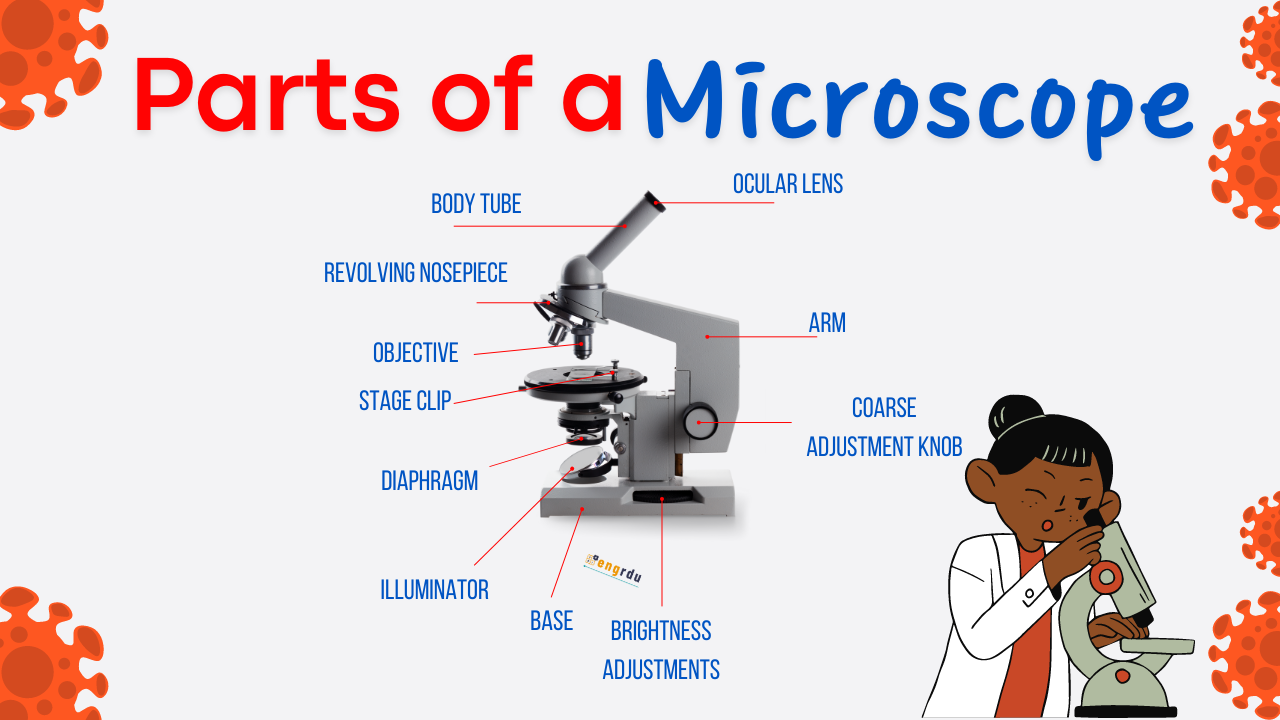
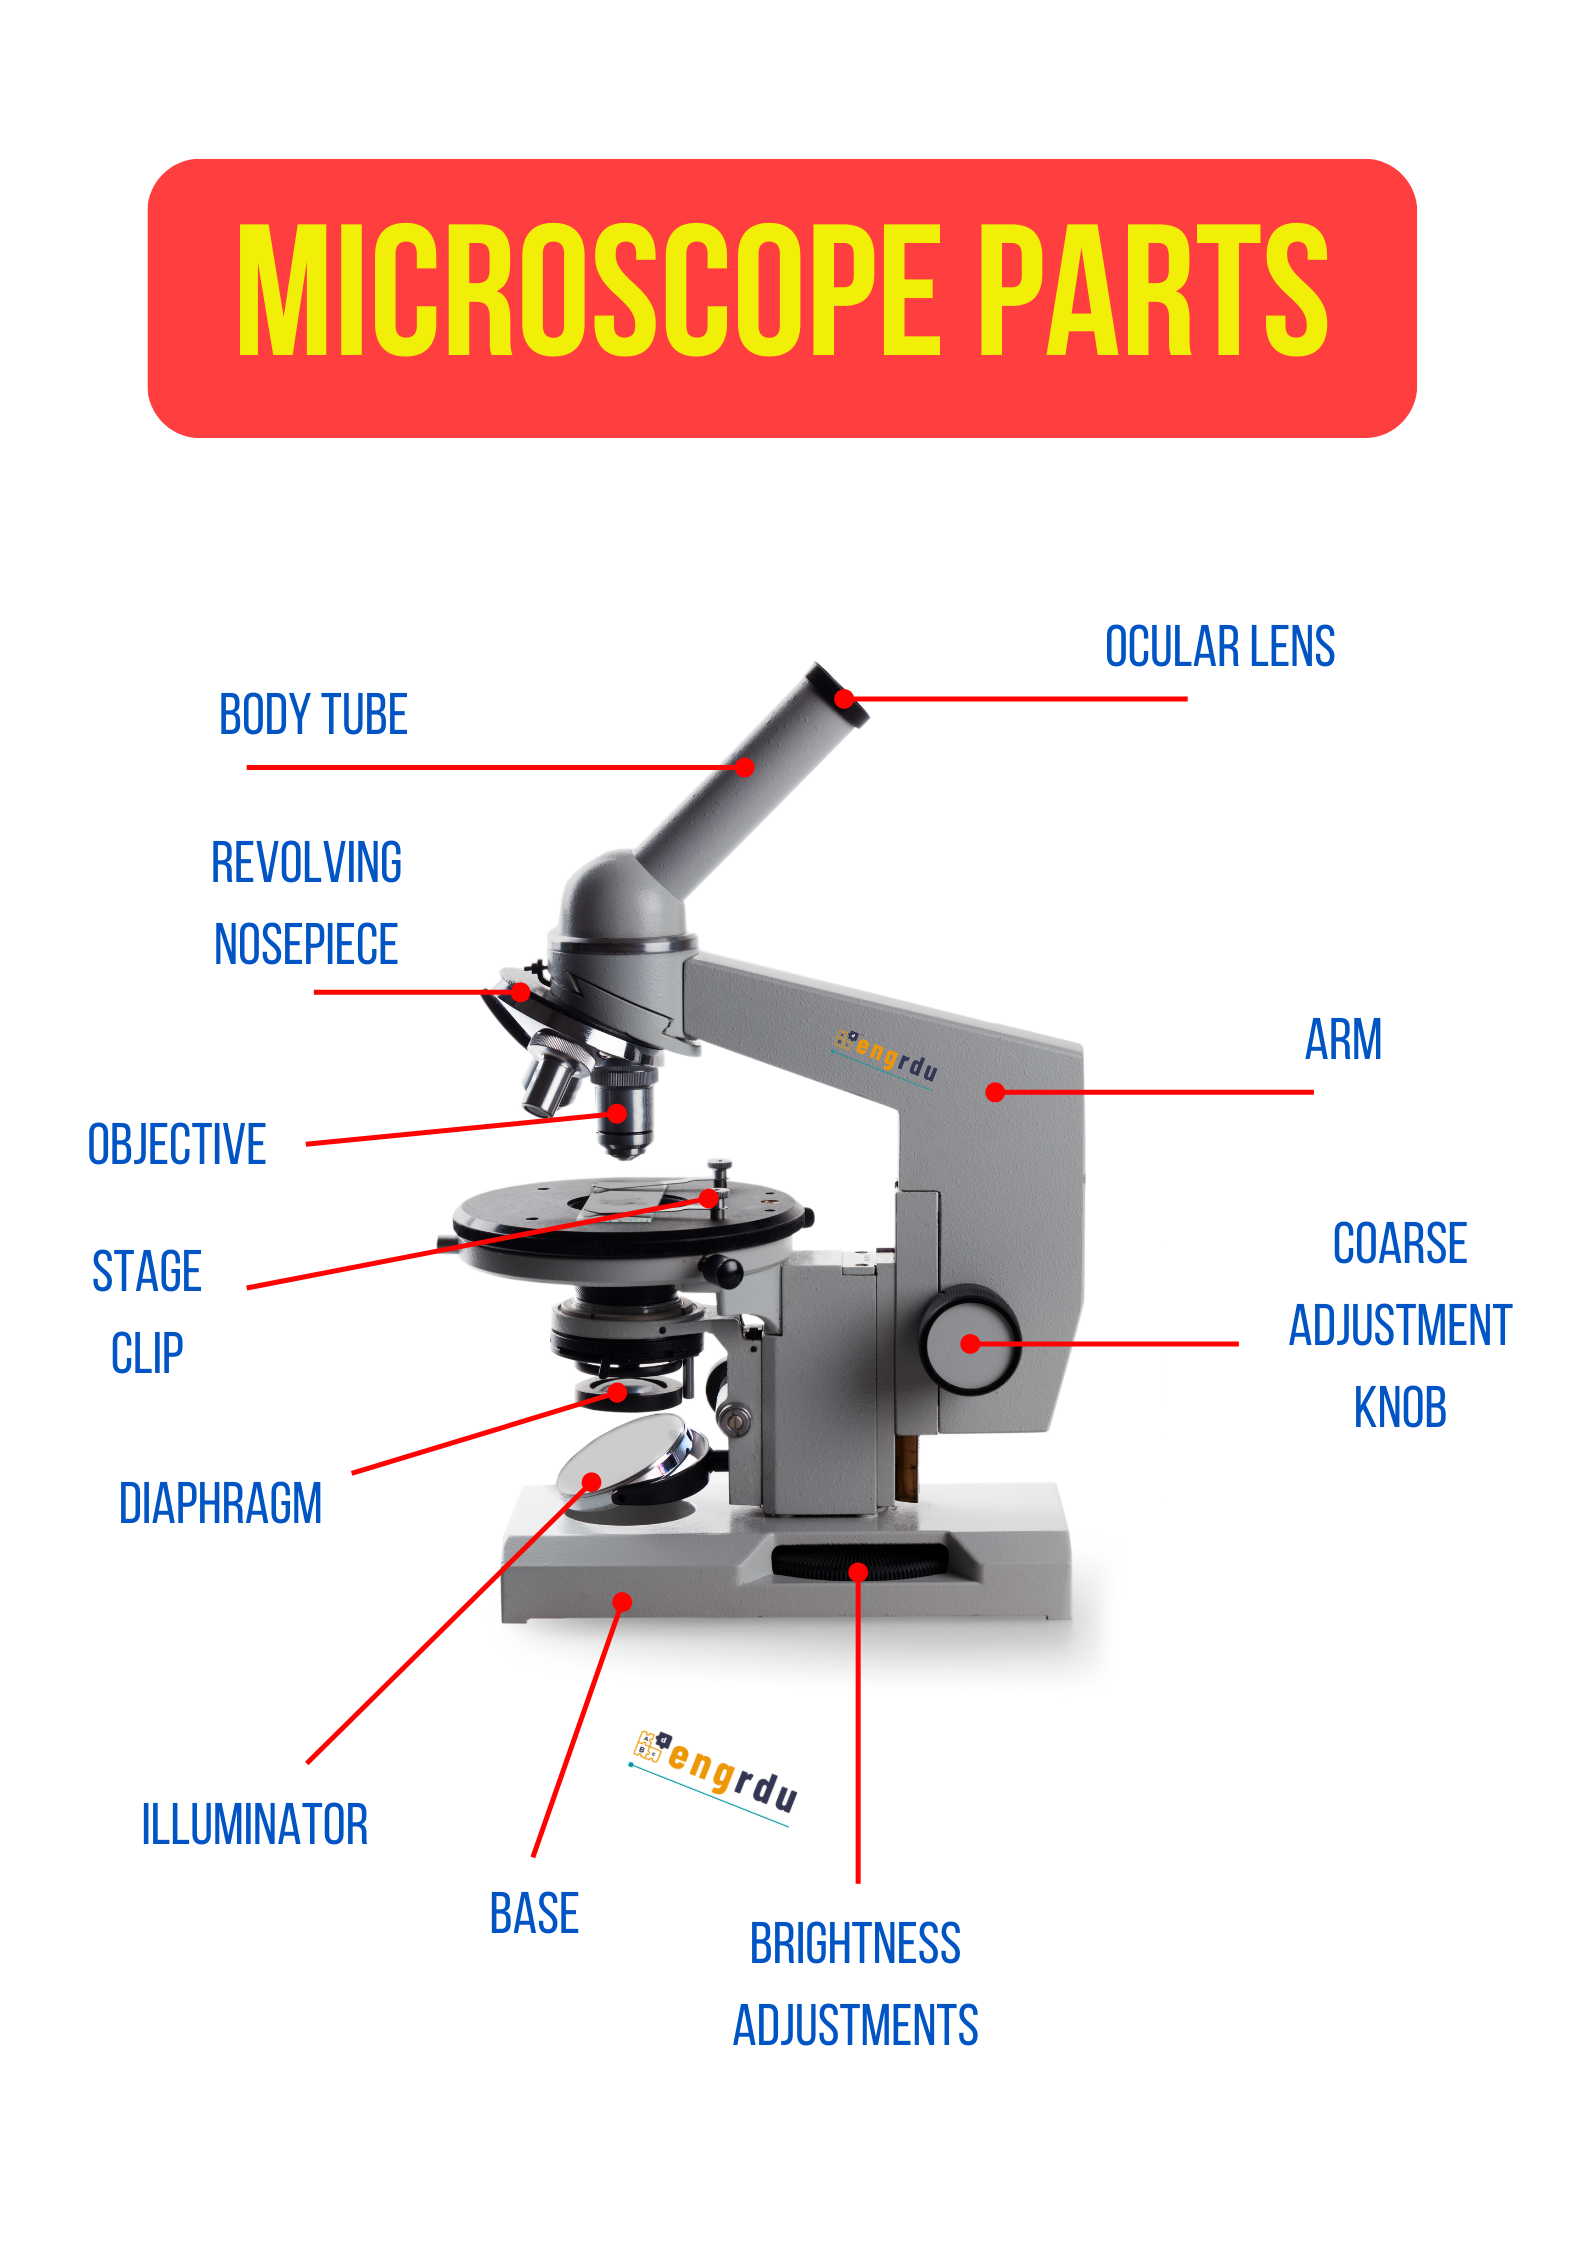
Understanding the parts of a microscope helps us to know the use of this powerful tool. Each part of a microscope delivers a clear, magnified image of tiny objects, enhancing our ability to observe the unseen world. Mastering these components helps us to improve the use of a microscope in a classroom, lab, and field study. Learn the entire lesson where we are going to discuss the parts of a microscope with short usage and helpful images. Let’s begin with today’s lesson:
Parts of a Microscope
Main Parts of a Microscope with Usage
In this section, we will know the main parts of a microscope with their helpful and important usage. After learning these usages of the parts of the microscopes, you can use this powerful tool in school, college, university, or as a scientist. So, don’t skip any part of this tool, which will help us to know the functions of a microscope.
1. Ocular Lens (Eyepiece)
- The ocular lens is the part of a microscope through which you look. The function of this part of a microscope has the magnification power of 10x and allows us to view the magnified image produced by the objective lens.
2. Body Tube
- The body tube holds the ocular lens at one end and the objective lenses at the other, ensuring the correct distance between the lenses for accurate magnification.
3. Revolving Nosepiece
- The revolving nosepiece holds the objective lenses and allows you to switch between different magnification levels by rotating it to the desired lens.
4. Objective Lenses
- These are the primary lenses that magnify the specimen. Microscopes generally have three or four objectives, each offering different magnifications, such as 4x, 10x, and 40x.
5. Stage
- The stage is where the slide containing the specimen is placed. It often has stage clips to hold the slide securely in place.
6. Stage Clip
- The stage clips are used to keep the slide stationary and secure during observation.
7. Diaphragm
- The diaphragm is used to adjust the amount of light that reaches the specimen. It helps control the brightness and contrast of the image.
8. Coarse Adjustment Knob
- This knob is used to make large adjustments to the focus. It is usually used when you start viewing a slide under low magnification.
9. Arm
- The arm supports the body tube and connects it to the base. It is also used for carrying the microscope.
10. Illuminator
- The illuminator is a light source located beneath the stage, providing the light that passes through the specimen, allowing you to see it clearly.
11. Base
- The base provides stability to the microscope, supporting its weight and ensuring it remains steady during use.
12. Brightness Adjustments
- This feature controls the intensity of the light, enabling the viewer to adjust brightness according to the needs of the specimen.
Microscopes allow us to magnify objects that are too small to be seen with the naked eye. If you are a student, scientist, or working in the study field, knowing the parts of a microscope and their functions is very important. After learning these parts of a microscope and their functions, you will be able to use these parts effectively without making any mistakes. We attached an image above of this section, which will help you to understand more clearly about the parts of the microscopes.


